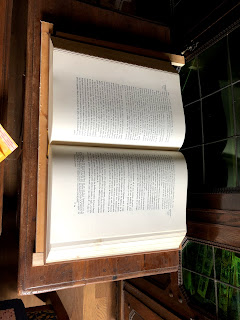
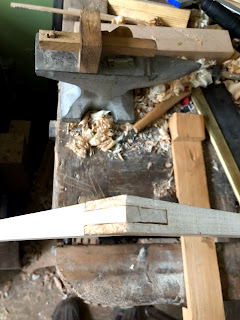
After spending a couple of day making corner/chow feet, I decided to try something a bit more involved... cabriole legs for a tripod stand (plates 137 and 138 of the book).
I started by copying the leg pattern, gluing the copy on thin plywood and cutting off the templates. The legs of the tripod are cut differently on each axis, unlike regular cabriole legs. This means 2 templates.
I just happened to have two off-cuts of ash that were in just the right dimensions to make 2 legs per off-cut. If the off-cuts had been a tiny bit thicker, I would even have managed 4 legs per off-cut.
As the shape is a bit more involved than the chow feet, I really had to reattach all the cut parts before sawing the other axis.
A whole lotta rasping, filing and sanding later... one Chinese cabriole leg in ash! Pencil for scale :)
After some more rasping, filing and sanding, I decided to stain the leg mahogany and to give it a good finish (2 coats BLO, 2 coats shellac, wax and buff)
Unplugged Woodworking
Sunday, 3 November 2019
Thursday, 31 October 2019
Chinese domestic furniture - first attempt
Earlier this week, I purchased a reprint of Gustav Ecke 1944 book on Chinese domestic furniture. I received the book yesterday and quickly decided to try making a scale model of the first couch table in the book.
The first step is to make a template for the leg and cut it out of a block of soft wood.
Then the fun begins... cutting the bridal joints that will hold the table skirt. Then cutting the half-miters.
Lessons learned from this attempt:
-cut the half-mitered bridal joints in the square
-do not connect them, leave all meat in the corner
-use a narrower blade on the bandsaw so there's less cleanup required
Thursday, 23 May 2019
Test build of 'the other Roubo folding book stand'
Last year, Lost Art Press published measured drawings for the other Roubo book stand scaled to hold their Deluxe edition of "Roubo on Furniture". I grabbed a pdf of the measured drawings and set to make a test build in soft wood before milling some hard wood for the real build.
I quickly ripped some fir to verify that the book stand would accommodate the 1977 edition. So far, so good.
I hadn't cut bridal joints in ages, so they are far from perfect.
Chopping mortises in fir can be fun as the wood is way too soft and crushes easily
Test fit of the book on the assembled top part
Making the support, in pine I believe
The top part is now complete
Making the bottom part is where it gets fun, as it needs a way to hold the top support in position
Chopping the recesses that will hold the toggle in position
All the recesses are chiseled. Here's what I did wrong... I started chopping them from the top but I should have started by the bottom one and made my way up. Chopping was unnecessary in this soft wood... paring down diagonally gave better results and the pared down recesses ended up being the exact dimensions from the drawing.
What I got wrong, part deux, I somehow made the part too long, so I had to shorten it from the bottom.
Fitting the hinges between the top and bottom. The Stanley 271 is so useful for those small mortises.
Finally, adding the two shelves that will support the bottom of the book... I decided to stick a molding on those.
The test build is finished and holds the limited edition without any problem!
The bridal joints at the end of the build were of a better quality than those at the start!
Finishing projects years after starting them
A few years back, I found an old violin in a sorry state and simply used it as decoration in the living room. Then in Spring 2017 I decided to bring it back to life...
The violin is a 19th century German copy of a Nicolaus Amatus violin that had a rough life. They're supposed to be good student violins.
Using a thin scraper, I popped the top open and started inspecting the extent of the damage. Three corner blocks were missing, so I started making new ones from straight grain fir I had stashed away.
Cut close to fit
The usual 'Nicolaus Amatus fecit in Cremona 184?' label from the 19th century copies made in Markneukirchen or Mittenwald.
It also had this hand-written note inside, stating that it had been repaired in 1904. I guess that's when the label got partially rewritten by hand.
The whole thing was covered in dust, and the nut was missing.
The top was in 4 parts
Starting to glue the top back together, adding patches of thin straight-grained fir.
Getting the corner blocks closer to the correct size
Shaving the patches down with a very sharp chisel.
It looks like it's put back correctly.
A few steps later, the top is back in one piece, on the right you can see the fingerboard
Fitting and gluing the third corner block
Clamping the top back on, I know those aren't the correct clamps for the task but I didn't use any pressure.
The fingerboard glued back in place... notice my very traditional hot glue pot on the right. For the entire project, I have used a mix of hide glue and bone glue.
And there it is, almost done. A couple coats of boiled linseed oil followed by a couple coats of shellac and it's looking nicer. I've ordered the missing parts and I'll finish the violin when they get here...
I received the parts a few days later... 2017 ended, 2018 ended, ...
Fast forward to this morning where I suddenly decided to finish it. I fitted the bridge, strung the violin, added rosin to the bow and tried it. Notice I didn't say 'set the sound post' because I wasn't able to do it yet. It pops out of the setter when I try to wedge it in position.
A new custom nut in rosewood, new strings, fine tuners on the tail piece...
Surprisingly, it plays and sounds rather nice. Setting the sound post would improve the sound and especially the volume. So far, it is staying tuned and I was able to play a basic scale on it. Next... twinkle twinkle little star. Did I mention it is actually the first time I pick up a bow and play the violin?
The violin is a 19th century German copy of a Nicolaus Amatus violin that had a rough life. They're supposed to be good student violins.
Using a thin scraper, I popped the top open and started inspecting the extent of the damage. Three corner blocks were missing, so I started making new ones from straight grain fir I had stashed away.
Cut close to fit
The usual 'Nicolaus Amatus fecit in Cremona 184?' label from the 19th century copies made in Markneukirchen or Mittenwald.
It also had this hand-written note inside, stating that it had been repaired in 1904. I guess that's when the label got partially rewritten by hand.
The whole thing was covered in dust, and the nut was missing.
The top was in 4 parts
Starting to glue the top back together, adding patches of thin straight-grained fir.
Getting the corner blocks closer to the correct size
Using a round plane upside-down in the vise helped shaping the corner blocks
Shaving the patches down with a very sharp chisel.
It looks like it's put back correctly.
A few steps later, the top is back in one piece, on the right you can see the fingerboard
Fitting and gluing the third corner block
Clamping the top back on, I know those aren't the correct clamps for the task but I didn't use any pressure.
And there it is, almost done. A couple coats of boiled linseed oil followed by a couple coats of shellac and it's looking nicer. I've ordered the missing parts and I'll finish the violin when they get here...
I received the parts a few days later... 2017 ended, 2018 ended, ...
Fast forward to this morning where I suddenly decided to finish it. I fitted the bridge, strung the violin, added rosin to the bow and tried it. Notice I didn't say 'set the sound post' because I wasn't able to do it yet. It pops out of the setter when I try to wedge it in position.
A new custom nut in rosewood, new strings, fine tuners on the tail piece...
Surprisingly, it plays and sounds rather nice. Setting the sound post would improve the sound and especially the volume. So far, it is staying tuned and I was able to play a basic scale on it. Next... twinkle twinkle little star. Did I mention it is actually the first time I pick up a bow and play the violin?
Subscribe to:
Posts (Atom)