Wednesday 22 August 2018

Christmas in August?

Today a couple of heavy parcels were waiting on my desk in the office :)

The first parcel is a mixed set of plough irons from good british manufacturers I bought on ebay.co.uk for pocket change... it contains a few J Howarth, Sorby, Marples, Varvil. J Howarth is quickly becoming a favourite tool maker of mine. I now have 2 infill planes (a smoothing plane and a shoulder plane) with his irons and they are really nice to use. The plough iron set has duplicates (1,2,9) and is missing a #6. Fortunately I had a #6 from IL&S that came with a wooden plough I bought years ago. I got lucky and the entire set does fit in one of the two wooden ploughs I bought in Germany years ago. The tool roll is quite tired, but it will serve as a pattern to make its replacement. I've ordered a 1m x 1m60  length of heavy canvas for that purpose.


I will sharpen them shortly on my Scheppach Tiger 3000 VS (a cheap German clone of Tormek I bought a couple of months back). I will first need to make a jig to ensure that the business end is square to the wheel surface as the tangs are tapering on both axis. This means I can't rely on the built-in square of the tool holder.

The next parcel is a present from my friend Brian at Toolerable. It was a heavy parcel, just shy of 10 pounds.


I had to wait until I got home at the end of the day to have a better look at the inside of the parcel:


It's a set of German-engineered dowel plates, covering from 3mm to 20mm. This is awesome as I was looking at crafting my own for round tenons. I've already tested it by knocking in a bit of 8mm dowel I bought from a big box shop and it quickly adjusted it to true 8mm diameter. I will need to try it further with various bits of straight-grain wood. Here's a video of Elia Bizzarri showing how dowel plates are used for tenon work.

Thanks a million Brian! They'll be put to good use!

Sunday 1 July 2018

Even more tools

This morning we did a quick check of a small flea market a few minutes from the house. It's not a huge flea market, but I always seem to find hand planes there. Today was no exception, I ended up spending 3€ on a pair of planes: a round plane and a panel-raising plane.

Here they are, as found.


5 minutes on the stones brought back the round iron to working sharpness (400 - 1000 - 4000 - 8000, CrO strop).


I then cleaned up and oiled the plane body, buffed it and took it for a test drive.


Cleaning up the panel-raising plane was pretty much the same work... clean up the contact point between the iron and the chip breaker, flatten the back and bring the bevel up to 8000 grits on the stone, followed up with a quick trip to a CrO strop.


I still need to make a replacement nicker and a replacement wedge for the nicker. I have seen two design variations so far... the nicker perpendicular to the planing direction and the nicker parallel to the planing direction. Interestingly enough, the channel for the nicker seems to have been done with a drill as two sides are parallel and the other two sides are rounded. This probably means that the nicker was a later addition to the plane.

This is now my second large panel-raising plane, both with a flat profile but a different slope angle.


The left one has a Ward iron, the hardest plane iron I own so far, skewed with a sharp angled arris on the work side. The right one is the new one

Tuesday 12 June 2018

Quick projects

On a whim, I have decided to redo the top of the Dutch tool chest. For the last few years, it had an ill-fitting bit of plywood attached with plain hinges. I have purchased different hinges and made a new breadboard panel.


I will attach it in the next few days.

For a larger project, I needed something that's been missing from my tool kit for some time already... a panel gauge. I raided the basement stash of old oak and started milling. I forgot to take pictures of the early stages of the project. I also conveniently had some brass left over from a project that had been postponed :)

Headstock roughly milled with a rabbet (21mmx20mm) for the brass and the arm mortise, boom arm (80cm, roughly 31 1/2 in) roughly milled.


I reduced the height of the headstock and carefully planed the arm to slide freely in its mortise. Last picture before I start drilling and countersinking for brass screws.

 The head was drilled and tapped for a M8 bolt... I pre-drilled a 6mm hole then slowly tapped it. The hole was drilled in the middle of the beefier section.
Next time, I will make a 7mmx2.5mm groove in the arm to receive a strip of brass... that should help with locking without damaging the arm.

Still left to be decided:
-keep the headstock flat and square or asymmetrical curve
-point, knife or both?

Monday 4 June 2018

More tools!

Last week I won a nice Record #50 on ebay.co.uk, for pocket change. It's almost complete... only missing the long posts (I have spare ones from a Stanley #50 and a Stanley #45) and the beading stop. I'm not sure I'd use the beading stop.

The seller threw in an English Stanley #271 in very nice condition.
I spent a few minutes cleaning up the bevel and it was taking nice shavings across the grain.

This weekend I also visited a flea market in the next village/suburb and made the deal of the century. Two antique French holdfasts for 1 euro each. I went there hoping, against all odds, that there would be a froe or a #113... but no such luck.

We also bought a few chicks from a friend living in that village/suburb and he should have some Muscovy ducklings for us next weekend. I'm currently building the frame for a chicken coop, hoping to fence/clad it by the weekend.

Friday 1 June 2018

Making dog bone chest lifts

On a whim, I have decided to make dog bone chest lifts for the rabbet and screws ATC I started building before moving. The chest itself is a mix between the traditional ATC and the "in two days" ATC. Rabbet and nails has been used traditionally for tool chests, but I didn't have any proper nails so I settled for screws instead. Anyways, I digress :)

Start with two blocks of oak roughly 30mmx60mmx300mm. Mark out the dog bone shape by tracing shoulders 75mm from the ends, and 15mm from the sides. Saw along the lines.

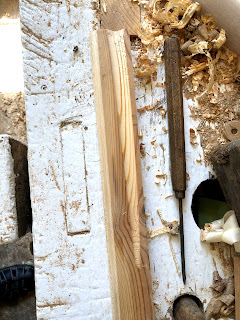
 Mount on the lathe and start turning the handle. I actually started by turning the ends of the bones where they meet the shoulders, then used the spindle roughing gouge to get a nice round handle.
 Trace a diagonal from the inside corner of the shoulders to the outside corner of the waste. Use dividers to draw a pleasing ogee. Saw as close to the ogee as you dare, then clean up with rasps and files.
 First chest lift done.
 Two coats of BLO and one coat of shellac... both chest lifts done!
4

Wednesday 30 May 2018

Cleaning up the pinching rods

All that was left to do on the pinching rods was to deburr the metal collars, find a way to hold the fixed part of the collars and bevel the ends of the sticks.

Deburring was done with a few passes on a belt sander, I drilled a 3mm hole through one side of each collar until it just started hitting the wood, drove a nail through the hole and across the fixed end of the stick. This doesn't move anymore.

A few seconds of chiseling later, the pinching rods were finished.


I'll make pinch rods using hardwood next, as this one is just a bit too short for the ATC :)

Tuesday 29 May 2018

Making pinch rods

Start with an appropriate section of mild steel square tubing, I have bought a 1 meter long square tube with an outside dimension of 20mm and a wall thickness of about 1.3mm. I also got a small bag of 20mm M8 bolts.

Cut two 1" pieces off the tube with a hacksaw and drill a hole of the correct size for the bolt you have (6.5 or 6.8 work for M8). Tap that hole.
Let's check that the bolt fits, it does...
Now find a piece of wood with straight grain and plane it until it's about 20mm by 20mm. Resaw it and check the fit in the metal parts.

The stick was originally longer, but it snapped at a knot when I cleaned up the saw marks.

Here's the almost finished pinch rod... all in, less than 30 minutes work. I still need to taper the sliding ends.


Sunday 27 May 2018

Quick turning project

As Brian from Toolerable was having fun making chisel handles, I decided to quickly make a London-pattern chisel using some leftover quarter-sawn oak. It won't be the most solid handle in the world, but I will probably use it for a paring chisel.

I started by ripping a long enough square section from some leftover oak, planed it perfectly square and marked the center on the ends. I then picked my octagon marking gauge and laid out the lines. Years back, I had made a template/pattern for the London chisel so I used it to mark the transitions.

Unfortunately, I didn't think about taking pictures until it was already mounted on the lathe. The pictures start with the extremities getting roughed out

 A couple minutes later, the turned parts are done... I just need to plane the octagonal part and add the finish. Here's the handle on top of its template.
 Before adding the finish, I switch the late to spin backwards and sand the turned parts to 600 grit. My usual finish for turned items is 2 coats of BLO, 2 coats of shellac and one coat of beeswax paste. Being lazy and in a hurry, I apply the finish on the lathe... it takes seconds and dries in seconds.
 I cut the handle from its spindle with a saw and clean-up the ends with a sharp chisel before adding the same finish on the butt of the handle. The finished item on top of its pattern:

Building a warping frame - part 3

Let's check we didn't mess anything :)
 Dry fit test for a row of dowels
 Assembly time, let's start by glueing the dowels
 Just a smidge of glue spread around the bottom of the dowel, then twist/hammer it into place until it bottoms out.
 One long side done
 The second long side done
 BLO on the short sides, drying off
 A long side with BLO freshly applied
 Apply glue to the half laps, check for square and clamp... wash, rinse, repeat until the 4 corners are done. Check once more for square to be on the safe side
Let it dry fully before applying the next coats of finish... I'll add another coat of BLO and follow it up with shellac.

Friday 25 May 2018

Building a warping frame - part two

I used the carcasse saw and a stop block in the miter block to cut the shoulders of the lap joints and free-handed the cheek. I used a router plane to clean up the cheeks when necessary, using another piece for support.
And the joints on all pieces were ready in short order.
 Somehow I had messed up my calculations for the short sides and the dowel holes would have interfered with the lap joints. I made new marks 8 inches on center and that was that.
14 holes left to drill before the next post :)