A while back, I bought an old Drabble and Sanderson back saw. It was quite dirty but should clean up to a very good saw, based on other saws from the same maker already in my saw till. As the saw plate wasn't very deep, I decided to joint the teeth and reconfigure it as a 14 ppi carcasse saw.
Let's start by fully removing the old teeth and cleaning the plate.
I ordered a pack of proper saw files from Dictum as I suddenly realized I didn't have files fine enough for 14 ppi. While waiting for the files to be delivered, I pre-cut the teeth spacing with a hack saw... in the end, that was quite a waste of time and energy as it didn't improve the results nor saved any work.
Teeth being cut in... astute readers will now notice that I forgot to order something with the files.
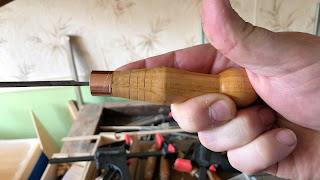
After getting massive blisters on my right thumb from the sharp tang on the file, I realized that a file handle would be neat... so I quickly turned one from some leftover cherry.
It was a marked improvement and I quickly finished sharpening the saw. Here's the reassembled saw, somehow I forgot to take pictures of the extra steps I had to go through (straightening the brass screws, cutting new threads on the screws, drilling slightly larger holes in the plate, ...). The saw plate got a generous coating with carnauba wax and was buffed. The handle was cleaned, received two coats of BLO and buffed with a BLO/carnauba mix.
The saw was drifting to the left, so I quickly stoned the left side of the plate until it cut plumb. The saw is now seeing daily use.


No comments:
Post a Comment