Dimensions and cut list of sorts:
two 1" x 3" x 6' boards, cut into 38" and 34" lengths
1 1"x10ft hardwood rod, cut into 20 6" dowels
General idea:
half-lap joint the long and short sides
have 6 dowels evenly spaced on the long sides (5" on center)
have 4 dowels evenly spaced on the short sides (9" on center)
Dimensioning the flat stock:
I started with two 18x70x1820mm boards of unknown hardwood that I found in the house when I moved in. I rounded the long sides down to 960mm, and cross-cut the board which conveniently left me with short sides just short of 860mm... close enough.
Marking the dowel locations:
Start by finding and marking the center of the board along its greater dimension. Make a mark 2.5 inches on each side, then mark your board at 5" and 10" from those marks. Using your square, draw a line across at each of the 6 evenly spaced marks. Find the center of the two outside lines and use a straight edge to draw a line along the length.
Repeat for the short pieces, marking at 4.5" and 13.5" from the center of the board.
Next up, the dowels:
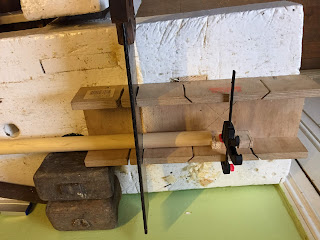
So it turns out the store didn't have 1" round stock... I could buy either 22mm or 28mm. As I read that 1" round stock was already a bit flimsy for the application, I chose the 28mm stock which came in 2700mm length (as opposed to the 22mm which came as 2000mm length).Use a stop block in your mitre/miter box, at the appropriate distance from your square cut. I placed my stop block at 130mm of the square cut and cut the first dowel. Spot the error:
I didn't pay attention and put the block on the wrong side of the mitre box for a push saw. Let's correct that and reset the stop block exactly at 130mm this time.
Wash, rince, repeat until you have a nice pile of 20 identical dowels.
Drilling the dowel holes:
So... you remember I said the store didn't have 25mm round stock right? It turns out that metric forstner bits are usually sold in 5mm increments... 15, 20, 25, 30, 35 mm diameters. While I have found 28mm forstner bits online, there were none in the store and I had none in my kit. I drilled a 30mm test hole in an offcut to see if that could work with wedging, but the gap was annoying.
Luckily, I had a 28mm jennings bit for my hand brace. Of course, the shank was too big for my drill press chuck... and the bit itself was too long for the neck of my hand cranked drill press. Hand brace to the rescue!
Start by using a birdcage awl to mark the starting point for the drill, push the screw in that nice starting point and start swinging the brace :)
Drill until you're through and test the fit
Let's check if we drilled plumb and square
After a small break to hone the bevels of the bit, let's start the second hole:
Way better!
Test fit, it's tight enough to hold the dowel upside down
That's it for today!


Cool. A warping frame has something to do with weaving, right?
ReplyDeleteCorrect, it is a jig to quickly prepare a high count of threads with identical (or close enough) length. It is used to prepare the warp (the threads fixed and held under tension on the loom) or the yarn for braiding.
DeleteI would guess that a warpipng frame has got something to do with chickens laying eggs.
ReplyDeleteBrgds
Jonas
Or is it the frame on which you could mount an Alcubierre drive? ;)
ReplyDelete